
Estimated Read time= 7 minutes
Dynamics 365 Business Central is Microsoft’s ‘comprehensive business management solution’. It provides organizations with the tools they need to manage financials, supply chain, business operations, and more, as efficiently as possible. If you use Dynamics 365 Business Central within your organization, you’ll be familiar with its robust reporting tools. It comes with many great reporting features out-of-the-box, including account schedules, Excel templates, and seamless integration with Power BI – a business analytics tool by Microsoft, with a free basic version.
Whether you are creating reports to analyze and present business information in a meeting, or are pulling information into documents such as invoices, Business Central allows you to manage your reporting with ease. When you create reports in Dynamics 365 Business Central, you can use either a built-in report layout or create your own custom layouts. One of the many advantages of using Dynamics 365 Business Central is that it enables you to simply modify report layouts in Microsoft Word.
In this article, we will talk you through how to modify your Dynamics 365 Business Central report layouts in Microsoft Word, so you can easily tailor your reports to better suit your reporting needs.
Modify Report Layouts in Word from Dynamics 365 Business Central
Modifying report layouts in Word straight from Dynamics 365 Business Central can be done in just a few simple steps. As an example, we will be showing you how we approached adding a COVID-19 message to a posted sales invoice report. However, you can use this method to amend your reports to add whatever information you need.
Step One: Before you can start changing the Word layout, you will need to export your report layout from Business Central. It is important to take note of the report ID so you can clearly identify your report in the next steps. In this case, our posted sales invoice report ID is 1306.
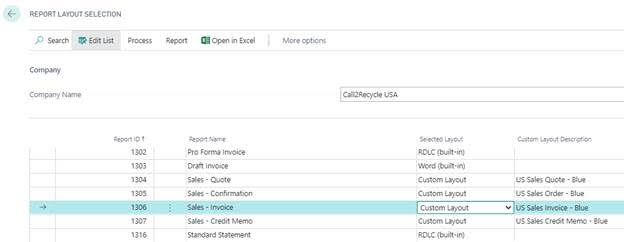
Step Two: Open the ‘Report Layout Selection’ page in Dynamics 365 Business Central. Find your report by looking through the ‘report ID’ column. In the ‘Selected Layout’ column, make sure the ‘Custom Layout’ option is selected and write a description of your custom layout under ‘Custom Layout Description’. Adding this description will prove useful later on by making it clear at a glance which report layout you have used.
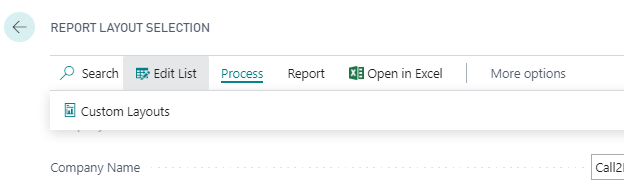
Step Three: Next, you will need to click ‘Process’ followed by ‘Custom Layouts’.
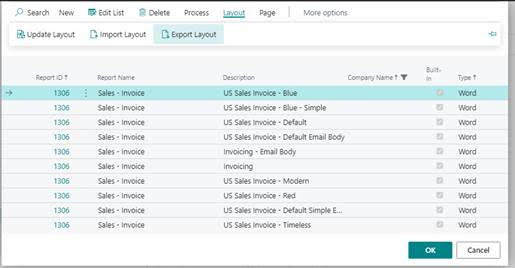
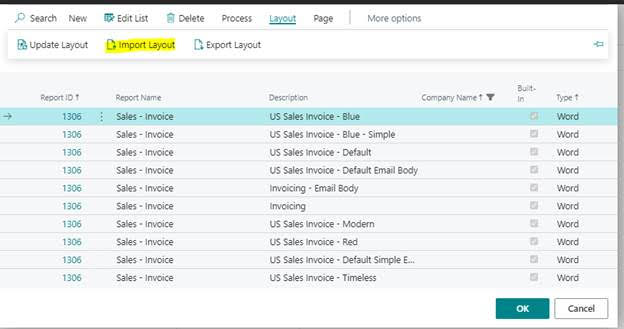
This action will open up the ‘Custom Layouts’ page which will display all the possible layouts available for your report. Select the layout you recorded in step two. In our case, this is the ‘US Sales Invoice – Blue’. After you have selected your layout, click the ‘Export Layout’ option.
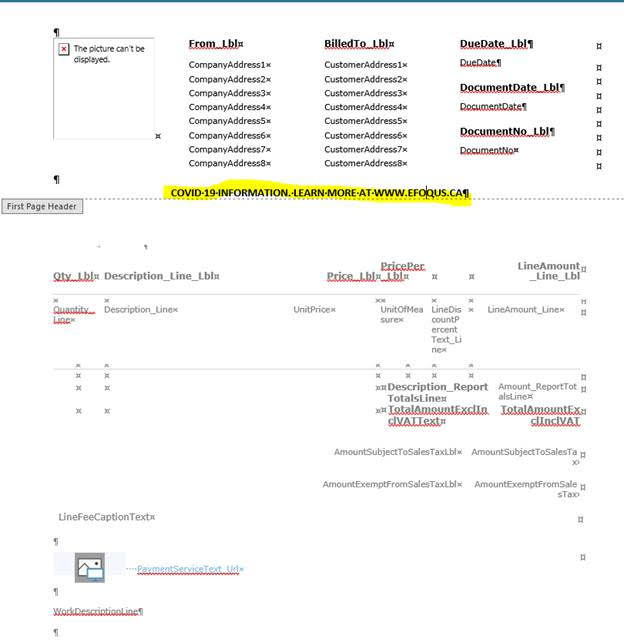
Step Four: Once you have exported the layout and saved it on your computer, open it with Word. This is the point at which you make the required amendments to the report, such as adding in additional text.
The required changes for our report in this example is the addition of COVID-19 text. Simply type in the text as you would do in any other Microsoft Word document. Once you have completed your edits, save the file and go back to the ‘Custom Report Layout’ page in Dynamics 365 Business Central.
Step Five: Now you are back on the ‘Custom Report Layouts’ page in business central, click on the line of report you have been editing. Again, in this example, we would click on the ‘US Sales Invoice – Blue’ line.
Next, you need to import the new report layout that you saved in the previous step. To do this, simply click the ‘Import Layout’ button and select the correct document.
It’s as simple as that! The next time we print this posted sales invoice report, the additional COVID-19 text will appear on the printed document.
This simple way of amending reports can make your life much easier when creating variations of documents. There are a number of ways you can apply this approach to editing your reports, such as adding important account information or even just adding a personal note or Holiday wishes to improve the experience of your customers.
Are you looking to Upgrade to Dynamics 365 Business Central?
Our senior team of senior Dynamics 365 experts will help you achieve success, delivering ‘om’ & peace of mind with Microsoft Dynamics 365 Business Central.
Modifying Layouts in Word for Dynamics 365 Business Central Reports – Tips for Advanced Users
If you are an advanced user of Dynamics 365 Business Central, you may be looking to complete more complex report layout changes. When it comes to layout changes within Business Central, you can also add new elements from the database, remove unwanted elements, or even move existing elements around to adjust the layout to suit your reporting needs. For example, as it stands our current ‘US Sales Invoice – Blue’ report layout does not contain a company bank account number.
To add this to the report, you must first enable the ‘Developer’ tab in Word. The Developer tab isn’t displayed by default, but you can add it to the ribbon in two quick and easy steps.
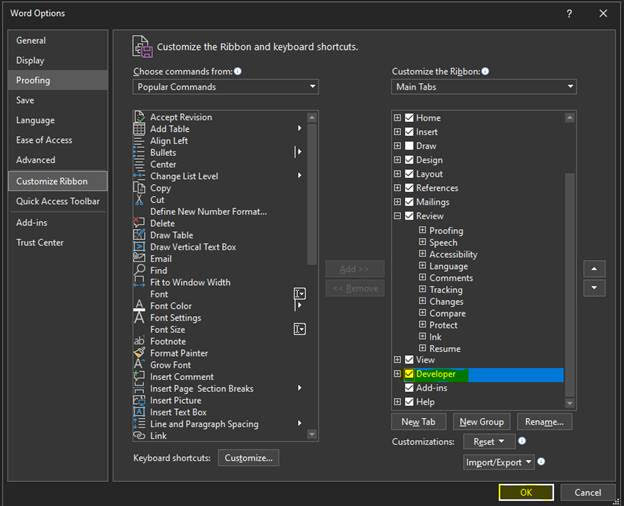
First, on the ‘File’ tab in Word, go to ‘Options’ and select ‘Customize the Ribbon’.

Second, under ‘Customize the Ribbon’ and under ‘Main Tabs’, select the ‘Developer’ checkbox as per the screenshot below. Click ‘OK’ to confirm your changes.
Following these steps and enabling the Developer tab will allow you to access all the fields specified in the report schema. These fields align with the information in your database and therefore the values will be drawn from there. This means that information like ‘Customer Name’, for example, will automatically show through on your report.
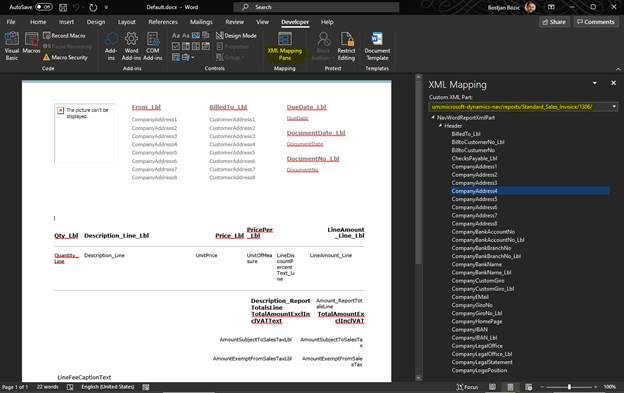
Having the Developer tab activated will also allow you to see the XML Mapping page. This is where all the database fields are stored, so you can see the options that are available to add to your report.
To add one of the options to your report, right-click on it and add it as rich text. Once the new element has been added to the page, it can be freely moved around to fit with your custom layout.
As well as adding new elements and moving elements around, you can also delete unnecessary elements from your reports once you have enabled the Developer Tab.
Once you are happy with the layout of your report, save the file and re-open the ‘Custom Report Layout’ page in Business Central. Click on the line of the report you have been editing and select the ‘Import Layout’ button.
I hope you have found this article useful and learned some valuable tips along the way. Please don’t hesitate to reach out if you have any questions!